Welcome, camping enthusiasts! There’s nothing quite like waking up to the crisp morning air and the peaceful sounds of nature while savoring a cup of freshly brewed coffee at your campsite. Whether you’re a coffee aficionado or simply in need of a caffeine boost to kickstart your day outdoors, we’ve got you covered. We’ll guide you through the process of using a camping coffee pot and a camp stove coffee pot, as well as providing tips on making coffee at a campsite. We’ll also address common concerns such as using boiling water for coffee while camping and the shelf life of camp coffee. So grab your mug and let’s dive into the wonderful world of campsite coffee.
Introduction
A camping coffee pot is an essential tool for any outdoor enthusiast who loves their morning cup of joe. Not only does it provide a convenient way to enjoy a hot and delicious cup of coffee while camping, but it also adds to the overall camping experience. We will explore how to use a camping coffee pot effectively and efficiently.
- Choose the Right Coffee Pot: The first step in using a camping coffee pot is to choose the right one for your needs. There are various types of camping coffee pots available, including percolators and drip coffee makers. Consider factors such as size, weight, and ease of use when making your decision.
- Gather the Necessary Supplies: Before you start brewing your coffee, gather all the necessary supplies. This includes coffee grounds, water, a heat source (such as a camp stove or fire), a coffee filter (if needed), and any additional ingredients like sugar or creamer.
- Prepare your Coffee Pot: Once you have your supplies ready, it’s time to prepare your coffee pot. Remove the lid and any filters or baskets from the pot, and make sure it is clean and dry. If you are using a percolator, ensure that the stem and basket are properly positioned.
- Measure the Coffee and Water: The next step is to measure out the desired amount of coffee and water. It is recommended to follow the instructions provided by the coffee pot manufacturer for the perfect coffee-to-water ratio. For a standard 8-cup camping coffee pot, you will typically need around 2 tablespoons of ground coffee per cup of water.
- Add Water and Coffee to the Pot: Once you have measured the coffee and water, add the water to the coffee pot. If using a percolator, fill the water chamber up to the designated level. Then, add the ground coffee to the basket or filter in the coffee pot, ensuring an even distribution.
- Brew your Coffee: The next step is to start the brewing process. If using a percolator, place it on the heat source, and allow the water to heat up. Once the water reaches the boiling point, it will percolate through the coffee grounds, resulting in a rich and flavorful brew. If using a drip coffee maker, simply turn on the power and wait for the coffee to drip into the pot.
With the aroma of freshly brewed coffee filling the air, your camping coffee pot is doing its magic. It’s essential to keep an eye on the brewing process and ensure that the coffee doesn’t overflow or burn. Once your coffee is brewed to perfection, remove the pot from the heat source and let it cool down for a few minutes before serving.
Using a camping coffee pot allows you to enjoy a cup of coffee in the great outdoors, providing a comforting and energizing start to your day. So, whether you’re camping in the wilderness or simply enjoying a peaceful morning in your backyard, follow these steps to master the art of using a camping coffee pot and elevate your outdoor coffee experience.
| Pros of Using a Camping Coffee Pot: | Cons of Using a Camping Coffee Pot: |
|---|---|
| 1. Provides a convenient way to enjoy coffee while camping. | 1. Requires additional equipment and supplies. |
| 2. Enhances the camping experience with the aroma and ritual of coffee brewing. | 2. Can be challenging to clean and maintain in outdoor conditions. |
| 3. Allows you to customize your coffee to your preferred taste. | 3. Requires a heat source, which may not always be readily available. |
How Do You Use a Camp Stove Coffee Pot?
A camp stove coffee pot is an essential piece of equipment for any camping trip. Whether you are a coffee lover or not, having a hot cup of joe in the morning can make all the difference in starting your day off right. But how exactly do you use a camp stove coffee pot? We will explore the steps and techniques to brew the perfect cup of coffee using a camp stove coffee pot.
Step 1: Gather your supplies
Before you can start brewing your coffee, you’ll need to gather all the necessary supplies. These include a camp stove coffee pot, coffee filters, ground coffee, water, and a heat source such as a camp stove or fire pit. It’s important to check that your coffee pot is clean and in good condition before using it.
Step 2: Add water
The next step is to add water to your camp stove coffee pot. The amount of water you add will depend on how many cups of coffee you want to make. Most camp stove coffee pots have markings on the inside to help you measure the appropriate amount of water. It’s best to use cold water for a better-tasting coffee.
Step 3: Add coffee grounds
Once the water is in the pot, it’s time to add the coffee grounds. The general rule of thumb is to use 1 tablespoon of ground coffee for every 6 ounces of water, but you can adjust the amount based on your personal preference for a stronger or milder brew. The coffee grounds should be evenly distributed in the camp stove coffee pot.
Step 4: Heat the water
To brew your coffee, you’ll need to heat the water in the camp stove coffee pot. If you’re using a camp stove, follow the manufacturer’s instructions for lighting and adjusting the flame. If you’re using a fire pit, place the coffee pot on a stable surface over the heat source. It’s important to monitor the heat to ensure that the water doesn’t boil over.
Step 5: Brew time
As the water heats up, it will start brewing the coffee. The brew time will depend on factors such as the heat source and the desired strength of your coffee. On average, it can take anywhere from 8 to 12 minutes for the coffee to brew. You can adjust the brew time by removing the coffee pot from the heat source or adjusting the flame.
| Coffee Pot Size | Number of Cups | Coffee Grounds | Water |
|---|---|---|---|
| Small (8 cups) | 2-3 | 2-3 tablespoons | 16-24 ounces |
| Medium (12 cups) | 4-6 | 4-6 tablespoons | 32-48 ounces |
| Large (16 cups) | 6-8 | 6-8 tablespoons | 48-64 ounces |
Once the brewing process is complete, carefully pour the coffee into cups or mugs and serve. You can enjoy your coffee as is or add extras such as sugar, milk, or flavored syrups to enhance the taste. Sit back, relax, and savor the rich aroma and flavor of your freshly brewed camp stove coffee!
How Do You Make Coffee at a Campsite?
Coffee is an essential part of many people’s daily routine, even when they are camping. There’s nothing quite like waking up to the aroma of freshly brewed coffee in the great outdoors. But making coffee at a campsite can be a bit different from making it at home. We will explore different methods and techniques for making coffee at a campsite, so you can start your day off right, even when you’re away from the comforts of home.
Method 1: Instant Coffee
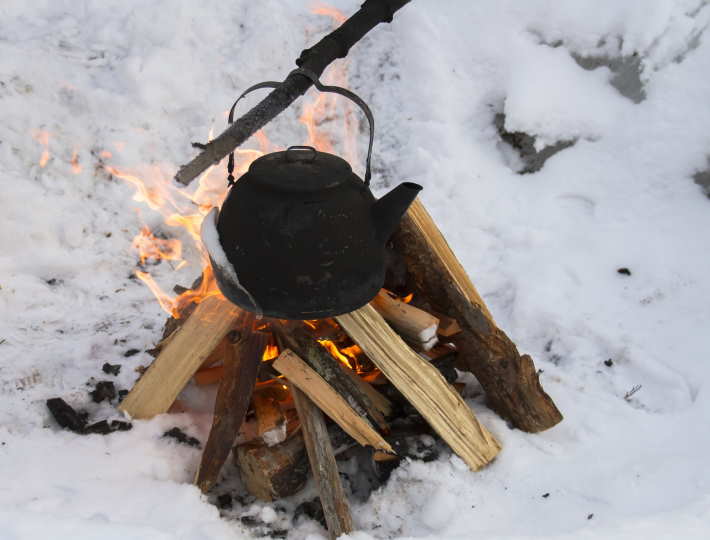
One of the easiest ways to make coffee at a campsite is to use instant coffee. This method requires minimal equipment and is perfect for those who prefer a quick and convenient cup of coffee. All you need is a cup, hot water, and your favorite brand of instant coffee. Simply boil water on a camp stove or over a campfire, pour it into your cup, add the desired amount of instant coffee, stir, and voila! Your coffee is ready to be enjoyed.
Method 2: Camp Coffee Maker
- Prepare Your Equipment: To make coffee using a camp coffee maker, you will need a camp coffee pot, coffee filters, ground coffee, and hot water.
- Add Coffee and Water: Place the desired amount of ground coffee into the coffee filter and secure it in the designated area of the coffee maker. Then, pour hot water into the coffee pot’s reservoir.
- Brew Your Coffee: Place the coffee pot on a camp stove or over a campfire and let it brew for a few minutes. The brewing time will depend on your personal preference for the strength of the coffee.
- Enjoy Your Coffee: Once the coffee has brewed to your liking, carefully remove the coffee pot from the heat source and pour yourself a hot cup of campsite coffee.
Method 3: French Press
A French press is a popular choice for making coffee at a campsite due to its simplicity and ability to produce a rich and full-bodied cup of coffee. Here’s how to use a French press at a campsite:
- Boil Water: Start by boiling water on a camp stove or over a campfire. The amount of water you’ll need will depend on the size of your French press and the number of cups you want to brew.
- Prepare Coffee: While the water is boiling, add the desired amount of coarsely ground coffee to the French press. The general ratio is one tablespoon of coffee per cup of water.
- Add Hot Water and Let Brew: Once the water has boiled, pour it over the coffee grounds in the French press. Give it a gentle stir, place the lid on the French press (but do not press it down yet), and let it steep for about four minutes.
- Press and Pour: After four minutes, slowly press the plunger down to separate the coffee grounds from the brewed coffee. Pour the coffee into your cup, and it’s ready to be enjoyed!
Can You Use Boiling Water for Coffee While Camping?

When it comes to camping, one of the essentials that many campers can’t go without is a nice warm cup of coffee in the morning. But what if you don’t have access to a coffee maker or an electric kettle? Can you use boiling water for coffee while camping? The answer is, yes, you can! In fact, using boiling water for coffee while camping has been a tried and tested method by many outdoor enthusiasts. We will explore the different ways you can make coffee using boiling water while camping.
Option 1: Instant Coffee
One of the easiest and most convenient ways to make coffee while camping is by using instant coffee. Simply boil water over your camp stove or fire, pour it into your mug, and add a spoonful of instant coffee. Stir well and you have yourself a hot cup of coffee in no time. Instant coffee is lightweight, compact, and doesn’t require any additional equipment, making it a popular choice among campers.
Option 2: Coffee Bags
If you prefer a more traditional coffee experience while camping, you can opt for coffee bags. Similar to tea bags, coffee bags contain ground coffee beans in a filter bag. All you need to do is boil water, place the coffee bag in your mug, and pour the hot water over it. Let it steep for a few minutes, stir if desired, and you’re ready to enjoy a fresh cup of coffee. Coffee bags are easy to pack, mess-free, and provide a richer flavor compared to instant coffee.
Option 3: French Press
If you’re a coffee connoisseur and want to replicate the taste and brewing method of a French press while camping, you can invest in a portable French press. This device consists of a carafe, a plunger, and a filter. Simply add coarse grounds to the carafe, pour in hot water, and let it steep for a few minutes. Press down the plunger slowly to separate the grounds from the liquid, and your coffee is ready to be enjoyed. A portable French press is bulkier and requires additional equipment, but it provides a rich and robust coffee flavor that is hard to beat.
How Long Does Camp Coffee Last?
When it comes to camping, many people rely on coffee to start their day off right. There’s just something about sipping a hot cup of java while enjoying the scenic beauty of nature. But for those who are planning an extended camping trip or are uncertain about the duration of their coffee supply, the question of how long camp coffee lasts becomes crucial. We will explore various factors that can affect the shelf life of camp coffee and provide some tips to help you ensure that your favorite morning beverage stays fresh throughout your outdoor adventure.
Temperature: One of the most significant factors that affect the longevity of camp coffee is the temperature it is stored at. Coffee is best stored in a cool and dry place, away from direct sunlight and heat sources. Exposure to high temperatures can speed up the oxidation process and cause the coffee to lose its freshness and flavor more quickly.
Sealing and Packaging: The way you store your camp coffee also plays a crucial role in determining its shelf life. Properly sealed and airtight containers help to keep moisture and oxygen out, which can greatly extend the freshness of the coffee. Consider investing in a container specifically designed for storing coffee, such as a vacuum-sealed canister or airtight coffee bags.
Roast Level: The roast level of the coffee beans used for camp coffee can also impact its longevity. Generally, darker roasts have a longer shelf life compared to lighter roasts. This is because the longer roasting process helps to remove more moisture from the beans, making them less susceptible to spoilage.
Ground vs. Whole Bean: Another factor to consider is whether you choose to bring ground coffee or whole bean coffee for your camping trip. Whole bean coffee tends to stay fresh for a longer period as the beans retain their natural oils and flavors until they are ground. On the other hand, once coffee is ground, it exposes a larger surface area, which accelerates the oxidation process and shortens its shelf life.
Storage Conditions: The conditions in which you store your camp coffee during your trip can also impact its longevity. Make sure to keep your coffee away from any strong-smelling foods as coffee can absorb odors easily. Additionally, try to minimize exposure to moisture by storing it in a cooler or dry place, and avoid frequent opening of the container to prevent unnecessary air and moisture from entering.
In conclusion, the shelf life of camp coffee can vary depending on various factors such as temperature, sealing, packaging, roast level, and storage conditions. By ensuring that your coffee is stored properly and taking precautions to protect it from heat, moisture, and oxygen, you can extend its freshness and enjoy a delicious cup of joe throughout your camping adventure.